I tried to find a nice simple set of plans (no drawers) but didn't find anything that looked right so I just made them up. I drew them out in my notebook so Elizabeth would know what I was going for. I can't seem to find them but if anyone wants them let me know and I'll go digging.
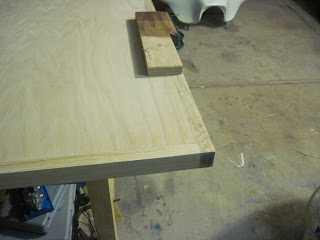
I picked up a Kreg pocket (I actually tried a cheap one from the home depot, but it was a piece of crap that required far too much measuring for each hole) hole jig to do the joint work as I didn't (and don't) have enough clamps for most other solutions. I started by getting a piece cut down to size, I tried on my table saw but it just isn't big enough working surface to do a full 4x8 sheet, so I clamped a strait edge to it and used a nice blade on my skilsaw to do the trick (after trying a cheap blade anyway...).

Before I got too far I routed over the edge and stained a sample piece with some different options we had around. We went with the Red Mahogany 225, seen on the right with just one coat.

The joints looked pretty good with the pocket holes, but not perfect. Getting the screws closer together on the back side would have helped, but they didn't look too bad and a little filler would hide the imperfections.


Skipped a few steps and get to getting the legs on. These are also done with the pocket hole setup. I freehanded a pattern out onto some scraps to make the pattern at the bottom of the legs. They looked pretty good after sanding.

Those are the shelves sitting between the legs.

And here's a shot with the shelves in place. I took some strips I cut from the edge banding on the top to make the veneer for the front of the uprights and shelves. They were held on with glue and brad nails.

Here is a the stain on the finished piece For some reason it came out splotchy :-(. I was pretty upset by this as the only solution I could find was to sand out the old stain, apply some sealer and restain. That wasn't an option for me as I didn't have much veneer left after finishing the edging on the top. It also wasn't getting much darker and Elizabeth wanted a darker desk.

We found a alternative to sanding it all down and got it darker in the process! Minwax Polyshades in Bombay Mahogany gave it the color we wanted and hid the splotchyness of the initial stain! We only did one coat of of the polyshades and finished up with 3 coats of clear polyurethane on top. It looks great and fits perfectly in Elizabeth's room. It even helps with homework! Having a quiet place to concentrate does wonders.

Doing it again I would go with drawers. The large shelves (deep shelves) were a pain to sand, stain and finish. Getting the poly in them was difficult, as the brush strokes have to be done in the direction of the grain and not leave any drips or thick areas. Next time I'll make drawers, mostly because I enjoy the putting together of the wood more than the finishing so I'll spend my time there.
I definitely like the kreg jig setup, it is quick and you don't have to wait for glue to dry to move on. I hit a couple of the screws when routing over the top that didn't get in at the perfect angle so I'll either need to do thicker edge next time or not drill the pocket holes so deep.

No comments:
Post a Comment