Wednesday, September 16, 2009

Work on Thompson Encore

So I picked up a Thompson Encore in .300WM early 2008 and put a Leupold VX-II 3-9X50 scope on it with Leupold dual dovetail rings. I was pretty excited about the setup but just couldn't get the kind of groups I was wanting.


My first round of attempted fixes was to lap the scope rings.
http://www.youtube.com/watch?v=L4oF_07X1qU
My groups still weren't where I wanted them but I couldn't see my scope wandering anymore, so off to the next attempted fix.

Oversized hinge pin. My original didn't feel too loose, but it wasn't very much money so I ordered the over sized one and put it in, it definitely is tighter, but the groups still weren't perfect.

Next up, pillar bed the forend. I wasn't a huge fan of the feel of the plastic forend so I decided to epoxy bed it with a tight fit then put in some pillar standoffs to get the free float that I was looking for. Groups still weren't great, but the gun felt a lot better to shoot.


By now it was getting close to a hunt I was wanting the rifle for and I was running out of time to play with the gun, so I made a couple changes at once. First, I got new rings, Burris Signature rings, they have a nylon insert that not only self aligns with the scope (so no lapping required) but also is softer so when compressed will grip the scope tighter. At the same time I measured the OAL needed with the Stoney Point OAL Gauge. I switch powders to RL-22 (very popular for the .300WM) and picked up the Barnes Triple Shock bullets (primarily because they had a published distance from the ogive to the lands recomendation). I loaded up several groups of bullets with varying powders and primers with the ogive 0.050" from the lands (using my fire formed brass, not new). The combination of these changes did the trick, the gun now consistently shoots sub-MOA, touching groups at 100 when I do my part.


I have since zeroed the gun for 250 yards and all the bullets go where you point them. I think the biggest factors in getting the gun accurate were the last ones I did, scope rings that won't budge and some properly loaded ammo.

As a side note, the factory ammo only shoots so-so out of the gun, the barrel was bored too deep so factory ammo sits inside of it, giving the bullets some float between the breech and the shoulder, and thus inconsistent jump to the lands. Still good enough for most hunting, but not what I was expecting with the cost of this rifle.

I'm still debating whether it was worth the investment, it is fun to shoot and looks sharp. If I were to do it again I would have bought the frame and barrel seperately, with the barrel coming from a third party like Bergara. From my research their consistency is much higher for quality barrels.

Thursday, May 21, 2009

Custom UNI Foam Motorcycle Air Filter

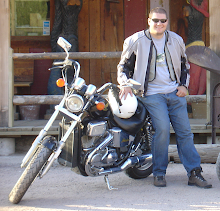
No real need for this project, just something fun and easy to do. I got my 1986 Honda Shadow VT700c about a year ago and have had a great time riding it. I figured the air filter probably could have held out a bit longer, but due for replacement. Prior to undertaking this project I ordered a replacement OEM filter in case I was unable to finish the project in a day I could still ride my bike.

This one was nice and easy. Just remove the paper media, clean the filter frame off and glue in the UNI foam. Total cost was around $15, about the cost of an OEM filter. I picked up the UNI foam at Cycle Gear. The glue was Silicone Adhesive I got at Autozone at some point.

The old filter material didn't look *too* bad, though the clean areas probably don't get much air flow through them (thus why they are clean).


The paper media was easy to remove, just grab and pull.


I held the foam up to the filter housing and cut it a little oversized to ensure a snug fit.

Kayla couldn't resist a pose with the foam and filter housing. I think this was taken after a thorough cleaning with brake parts cleaner so the silicone adhesive would stick properly.

I used a bunch of the adhesive, probably too much, but that's how I do things. I think that's about a 1/4" bead all the way around. A few parts are a little thick, a few a little thin.

I used some packing tape to help hold the foam on the housing properly, though there was really only 1 edge that needed it.

Here it is starting to set up. Before the silicone set up I went around the inside seam of the filter and squished the silicone flat, removed what would come out. Make sure that none of it will come off and get sucked through your engine!

I used Kawasaki filter oil that I had laying around from the days of my 1983 KZ750. Maybe if I keep this bike long enough I'll be able to use the can of filter cleaner too!

And here it is all installed on the bike. You can see the oil starting to pool up at the bottom of the filter. This is of course due to my putting too much oil on it and/or not squeezing the excess oil off enough. I threw some kitty litter on the floor where it spilled out and fired up the bike to burn the rest through the engine.

As far as performance, the bike seems to pull a little harder at lower RPMs, and I like to think it sounds nicer. Both are probably just placebo effects. If I notice a difference in the MPGs I'll update the post. My average on the bike is 48.7 with a high of 56.1. The last 3 tank average prior to this filter change is 50.4, I've been taking it easy lately :-).

Sunday, May 3, 2009

Lets make some knives!

Alright, so more like making the end of the knives, or finishing them, as the complete make would require some blade smithing that I don't have the forge to do :-). Pat had mentioned that he was looking for some nice kitchen knives, so I used that to trick him into doing a project I had been putting off for a while. After a bit of convincing we ordered some blades and scales from Knife and Gun Finishing Supplies and waited around for them to arrive.

A little background: My brother Mac first sparked my interest in knife making when he made me an awesome knife a few years ago, complete with water buffalo handle and a hand crafted sheath. I figured I was pretty tooled up for such an adventure so why not. Jenny was needing some nice knives for around the kitchen as the current low end stuff we had just wasn't cutting it. No, it really wasn't. The cheap steal used was some generic stainless or "surgical stainless" or even 440 steel, not specifying that they are A or B. Unfortunately, most of these make great butter knives but don't really hold an edge well. To get a good edge you'll need something with a bit more carbon in it like ATS-34, 440C stainless, or some 0-1 steel. None of these are as stainless as 440A or B due to lower nickel content, but hold an edge nice enough to do some real work around the kitchen.

We went with some nice 440C blades. For the handles (slabs or scales), we went with some Pakkawood (pretty similar to Diamondwood) handles due to being impervious to water. They also look nice and are more affordable than a burl. Alright, enough intro, on with the knives.

Getting started is pretty simple, we taped the scales together and mark the holes for drilling. Also, you'll note that we taped the blades for their protection and ours, they are sharp!

You'll notice that I have an excellent support to hole the handles up for my drill press. I needed to keep it level and have space for the clamps, and these were handy.
Nice and drilled, ready to have the pins droped in and their outlines traced.

Pat, who is looking forward to a career teaching middle school shop, is instructing Narasimhan on the proper use of the drill press.

Trimming the pins to go through the handles is a pretty simple process, but only when your rod isn't wiggling around on you. Lesson learned, grasshopper.

You have to get close when cutting the scales if you hope to breath in the sawdust. Coughing up brown crud is an essential part of any project involving wood.

Pat figured out the scroll saw.

Here we are, holes drilled, scales cut to a usable size and pinned in place. One step not shown is cutting, sanding and polishing the leading edge of the handle prior to this point, as it will be more difficult to get it polished close to the blade when it is all glued together.

Someone likes bread.

Here they are, blades compeltely covered in tape to keep the epoxy off, with epoxy oozing from them. Prior to the epoxy hardening they were covered in clamps.

Blake is demonstrating proper safety attire in the shop. Missing are his big red ear muffs. Pants and shoes are always optional.

Finally getting to the more enjoyable parts, sanding the handles down to a nice shape. I picked up a nice 1" wide belt sander on craigslist for the task, though there were a couple parts where a more conventional 4" or 6" wide belt sander would have been more useful.

Handles have their rough shape, now doing a nice hand sanding on them to make sure they are perfect. This took too long and wasn't very fun. When we got down to 200 grit we wet sanded.


Sanding is complete, I think we went to 400 grit before polishing. This was a lot of fun because it took all of the rough marks out and made them really shine, showing off all the contours exposed during the sanding.


Here is Pat's finished bread knife next to mine (not even epoxied yet).

The sanding in this project took longer than I had anticipated. Getting the shape of the handles isn't too tough, but I still managed to mess it up on the large chef knife while trying to do something fancy. I have gained a new appreciation for the amount of work it takes to make one of these. I'll probably stick to hunting knives from here on out if I make any more, but am glad to have done these. One thing that I wish I had done different was ordered flat ground blades instead of hollow ground blades. I think they have a nicer look to them.

Prior to this project I had asked Mac to make me a set of steak knives for use around the kitchen, not realizing the huge task it is. I have since come to realize it is better to buy a decent set and save the craftsmanship for special knives like the chef knife or hunting knives that are likely to be passed down as heirlooms. Happy sanding :-P.

Tuesday, April 28, 2009

Adirondack Chairs

So someone at work got it in my head that I needed to make some outdoor furniture, the plan was to make 6 chairs, 2 for each of 3 of us. After looking over a bunch of chairs and reviewing several online sets of plans, I decided to go with Norm Abram's plans (available here) from the New Yankee Workshop.


If you have a look at the picture I'll point out a few things I like about them. First, the seat curves. A lot of the plans I looked at had flat seats and that is not the shape of my butt. Second, no vertical support in the rear of the chair. A lot of plans I looked at have a support for the back of the arm rests and this one uses the seat back to support the rear of the arm rests. This set of plans also included a little table and leg rest, so off I sent for them.

For some reason I was expecting full sized plans, so was a little disappointed when I discovered that I would have to blow them up myself. After a couple failed attempts at scanning them and projecting them at work, tracing onto large paper, but couldn't ever get them scanned well enough to work out. So we were stuck with the manual method of drawing a grid on the boards and matching the lines within the grid on the plans at a larger size on the boards. We did this onto masonite so we would have a nice template to trace onto the boards. I think this part of the job took longer than the rest combined. Drawing the one inch grid on the boards was very tedious.

By the time we got the template cut out it was getting pretty hot but we decided to press on a bit longer. We cut the main supports, front legs, arms and arm supports before calling it quits for the day, more on that in a sec...


Here I am demonstrating to Narasimhan the proper way to squat (or hunker down, depending on where you're from, it's very technical) while working on any project. He is a fast learner.

Narasimhan is cutting the arm rest supports on the scroll saw, does my renter's insurance cover personal liability suits?


I'm cutting the front legs on the ShopSmith table saw. A good all purpose tool if you don't have a lot of space, but I'll be getting a real tablesaw as soon as I have some space.


And here we have the lower portion of the chair complete. This seemed to go pretty slow up to this point and it was hot and miserable.


This was my breaking point for the day. After cutting this out and routing the edges I don't pre counter-sink the wood and treat it like green pine, figuring the screw head will stuff into it fine. Nope, cracked on the last screw, and after a few choice words I sent it across the garage and quit for the day.


After resuming work (and getting a nice countersink drill bit) things moved along smoothly. I used liquid nails on most of the joints, though it got a bit tedious after a while. The arms went on fine, though I didn't get them on perfectly strait, it was good enough.


And the back support. This is bolted on pretty nicely, though it was kind of a pain keeping everything still while drilling through the (mounted) arm rests and the back support at the same time.

Hooray! Cutting out the back rest slats. Getting close to sitting down :-D.


Back supports are on! If you look at the gaps and tops of the slats you can see they don't line up quite right. The gaps are off because I didn't get the arm rests strait, and the tops are off because I was freehanding that part.

I'm routing the back seat piece. It is curved to match the curve of the back rest, fancy...

I had been screwing most things down, but by the time I got to the seat I figured some 2" brad nails would do the trick for them, as they don't get many lateral forces.


And here is the completed chair, well, almost. It still took a bit of time sealing it up with some wipe on polyurethane. I'm debating making the back rest a little taller on the next one so I can lean my head back to fall asleep, but I'm pretty happy with the way this one came out. It feels pretty solid though I wonder if I would have been better off using 2x4s for the front legs.

This was the only chair we ended up completing, though assuming the house purchase goes through I'll need some more seats near the pool. Pat (who tricked me into this project) pretends that he'll make some too, and of course Narasimhan wants his. A nice easy wood project, everyone should make a few.

Here's a quick snap of it at night all sealed:

Sunday, April 26, 2009

How I got rid of my mother

My mom came down in the middle of March to see her grand kids (and not just mine anymore!), and while stopping by my house before heading home to Flagstaff locked her keys in the car. It was a Sunday so I was reluctant to call a locksmith, both for their Weekend rates as well as requiring someone to work on the Sabbath.

She had mentioned just staying the night and getting it taken care of in the morning, but I would have none of it :-D. I was determined to get rid of my mom get into that car! I couldn't find any metal bands they use for holding 2x4s together on pallets, so I tried the trusty old coat hanger (though it was a trick to find a wire one, most of mine are plastic). I cut a little wedge out of wood to hold the window seal away from the glass like the one I used in the pro slim jim kit I have used in the past. No luck, the coat hanger didn't have enough rigidity to get a feel for the part I was looking for and after half an hour at it I gave up on that approach. Back when I had my Blazer (and frequently locked myself out) I kept a coat hanger between the leaf springs and could jimmy the door in under a minute! Not sure if I should feel smart for getting in or dumb for locking myself out so often (once out in the desert with Jenny, had to search for 20 minutes to find a coat hanger, thus the truck mounted one :-S).

There was a glimmer of hope still, as the key was on the seat. I remember reading about the diebold voting machines easily broken into by filing the key they had a picture of on their website, so I figured I would give it a shot.

I took a picture of the key and got a blank at the Home Depot (yeah, I know, shopping on Sunday...oxen in mire, trust me...). Out came my files, the one for my chainsaw was the fastest with the triangular one finishing up the edges.


It took a few attempts to get it open, filing, trying it, more filing. I started on one side of the key because most lock tumbers are only on one side of the lock mechanism, but filed the other side after I thought I had filed the first too much. I don't know which side I eventually got working because it only worked one way when I got it, and also only opened the worn mechanism in the driver's door.


Hopefully you won't have to do this one yourself, it got kind of frustrating jiggling the key around without it turning the lock.

Old Projects: 55 Gallon Smokers

Back when I was in my old house I started to make some smokers for and with some friends. This was all before I had done any smoking myself, and I was mostly just helping out and providing some shop space.

We though we had it planned out pretty well. We had a full size barrel for the smoking and a barrel cut down to 1/3rd for the fire box. We were then cutting lids out of another barrel so they could be oversized and overlap the opening in the smoking barren and fire box.

I ended up moving out of the house before we could finish the project and sending the unfinished barrels and frames to Jason's house, so no finished project here, I do have some nice pictures (old low res) of the process :-).


Jason cutting an opening in the fire box.


The two fire boxes ready to have ends welded on and doors attached.

Mock up of how we'd like them layed out when complete.

Jason cutting frame pieces.

Ahh, gotta love the way the welding looks on camera :-)

Frame ready to be welded into one piece.


Tada! The barrels are just resting on the frames, we didn't make it much further after this step, maybe I'll try another time, but bigger! :-D