I've been on a kick to get my utility bills down and make the house more comfortable to be in. On my laundry list of ideas to try was an attic fan, reasonably priced at under $100 and no waiting for things to grow. I had a $10 off a Lowes so picked up their 2300 sqft model. The box has a template on the side, so I cut it out and headed into the attic to make sure it would fit the way I wanted. That's it, in the false gabled end through that hole. Fun.

After crawling back out with measurements of how big to make a mounting board I got it all cut out. It is necessary to block off the air passages around the attic fan to prevent the air from swirling instead of being pulled through the attic, thus the 20"x30" piece of plywood.

All mounted up with the thermostat, looks pretty good.

Also hooked up the wiring before entering the attic. I measured how much romex I needed before leaving the attic, this needed to be a two trip deal.

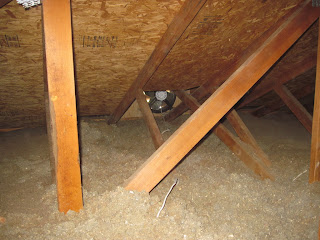
I got a little concerned about fitting it through the hole, it isn't even the width of the trusses (which are 22"ish). It fit fine.

Now for the fun part, I thought it was bad enough getting out to the gabled end when I didn't have to carry anything other than a tape measure and piece of cardboard. This was a pain. And of course I made the classic weekend handyman mistake, didn't measure to make sure I could get it into place. I got lucky with being 20" tall, as I could skootch it between the trusses on top of the insulation. Getting it upright was interesting. I thought I would be yelling for a jig saw to take off the corners but with a bit of jostling was able to work it into place. A few screws later and I was crawling backwards with the wire in hand.
And that was it. I wired it into some unused plugs that are for swamp coolers on the roof. Guess I better make sure they are hot before summer arrives. The thermostat is set to 120F, the hottest it would go. I figured this would be a good starting place but may turn it down a little if I can crawl in there again.


